

I looked a bit at window coverings to use for the curtains on the closet but did not find anything that I loved...So out came the sewing machine.

I found 2 fabrics that were perfect and decided to make my own curtains. It seems like it would be pretty easy to piece them together...and it was!
I love the result it is exactly what I wanted. A pop of color with a bit of pattern. I really like the way they frame the closet.
Project Rankings
Difficultly - Medium
This gets a medium only as it is a bit difficult to calculate and determine lengths that you need for the fabric. You need to take a number of things into account. I tried to list them all below. I have also included the dimensions I used as a starting point. The actual piecing this together is a cake walk.
Frustration Level - Low
Makeability - 100% worth it!
Materials
Fabric -
I used 2 different kinds but obviously you could do more or less. As far as how much fabric you need it will depend on the length of your panels and the width you need. the specifics listed below are for what I used on my closet.
My dusty pink fabric came from Joann's. It is a home decorator fabric.
My gingham fabric is from IKEA. It is also a nice home decorator weight. I am not sure if you would want to mix a simple quilt cotton and a decorator weight...2 cottons would probably work though.
1/2 inch fusible tape
Normal sewing stuff, pins, thread, sewing machine, etc.
Step #1:
You will need to measure your area to determine the width and length of your panels. I can't stress enough that you should measure twice and cut once! You will need to determine if you want your curtains hitting the floor or not, I did not. You will also need to determine how high above your window or closet you want to place your curtain rod. If you are doing multiple fabrics you will need to determine how much length of each you want. I wanted my second/bottom fabric to be smaller than the first as I wanted the pattern piece to only be an accent and not overpower the room with the gingham pattern. For the width of your fabric you will need to determine if the curtains are just for shoe or if you want them to be able to be untied and pull across your entire closet or window. I did so I did make the panels wide enough to cover up the closet (in case it is a mess and company is coming over). All of those decisions will factor into your dimensions. In addition you will need to account for seam allowances as well as the width of your curtain rod.
Listed below are what I did and why so that if you are inserting your own measurements you will need to make your adjustments. I added 1/2 inch to each edge for a seam allowance. This allowed me to sew a 1/4 inch, turn under a 1/4 inch and top stitch.
Dusty Pink Top Fabric - Cut 2 of this size for the 2 panels. 56 inches long x 36 inches wide
Gingham Bottom Fabric - Cut 2 of this size for the 2 panels.
27 inches long x 36 inches wide
Additional material is needed if you plan on sewing the tiebacks. You could also use cute ribbon or something like that. Or you can make your own. The instructions for the tie backs are at the end of the curtain tutorial.
Step #2:
Pin the right sides of your 2 pieces of fabric together. Sew together using a 1/4 inch seam allowance. Press your seams out.

Step #3:
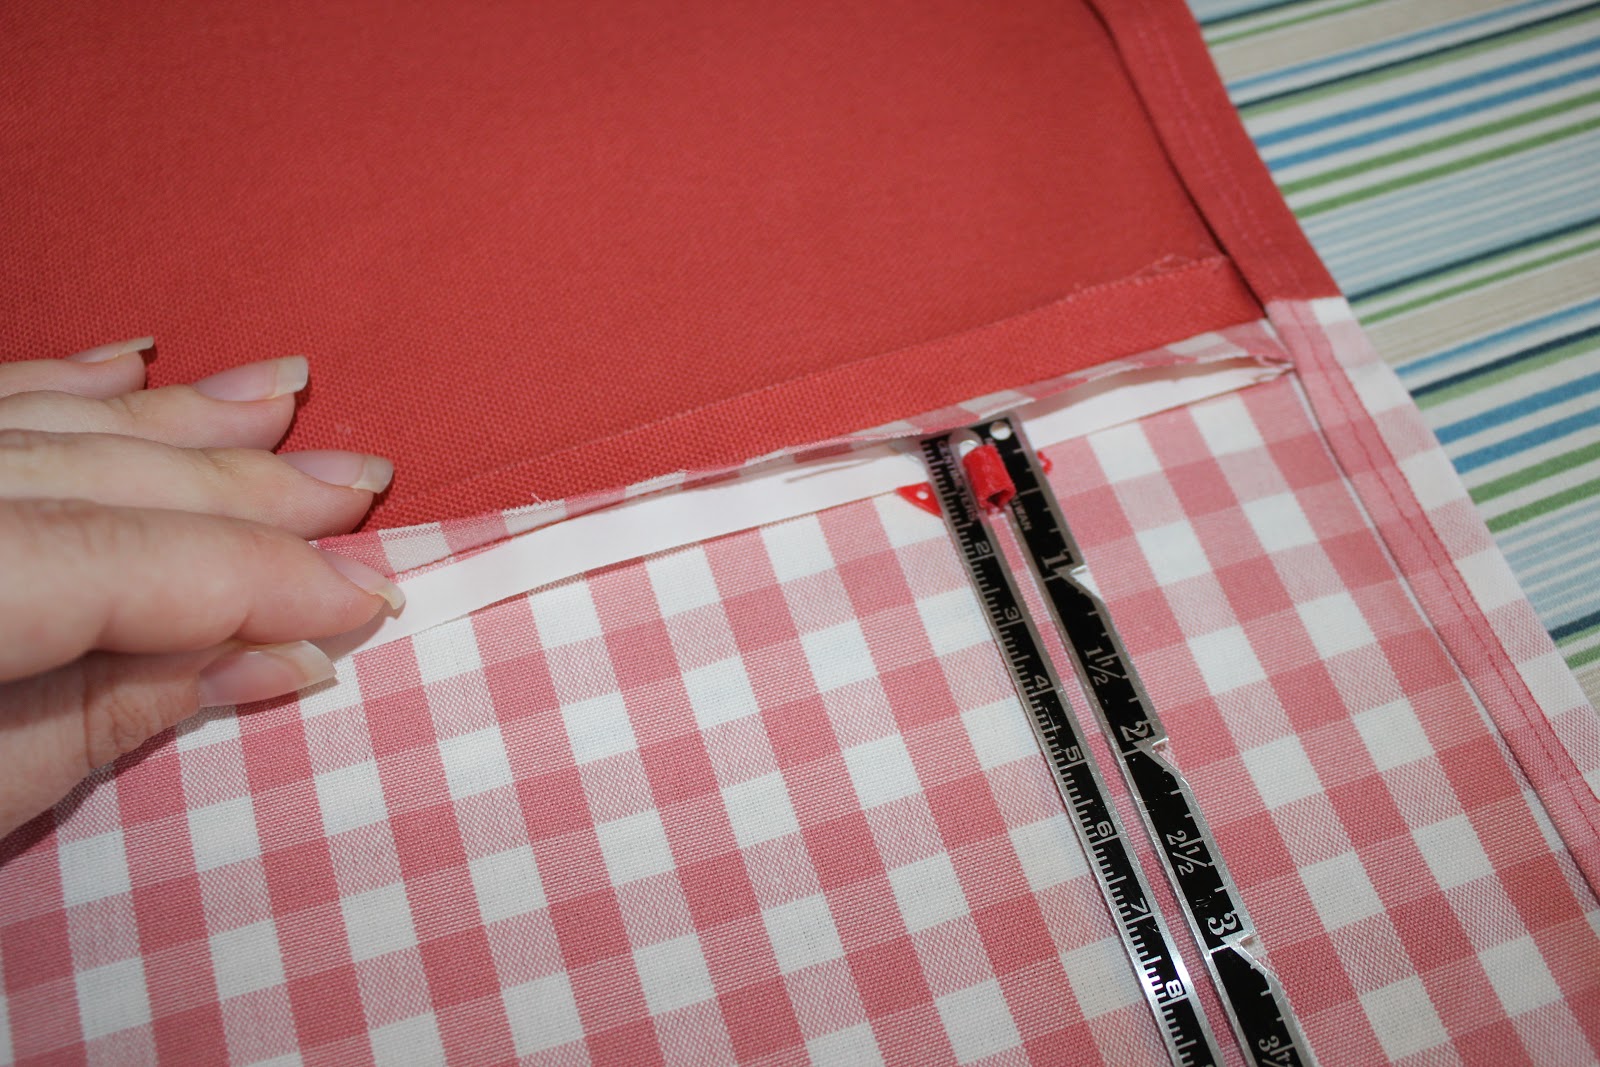
Cut your 1/2 wide fusible tape in half to the width of your panel. Place one of your 1/4 inch tape strips under the pressed out seam as shown in the picture. Iron in place. Remove the tape backing and iron the fabric seam down onto the tape. Repeat for the other side of pressed seam.
Step #4:
Next up pick one of the long sides (not the top or the bottom of the panel) and turn fabric under 1/2 inch (turn under to the wrong side). I pressed out the turn under and also pinned it (I like to use pins...).
Step #5:
Sew in place using a 1/4 inch seam allowance.
Step #6:
To make it more "finished" looking I turned under another 1/2 inch and sewed another 1/4 inch seam allowance. That way I don't end up with any rough fabric edges. I could also just turn under twice and then sew once but of course I didn't really think about that at the time.
 Step #7:
 Repeat Steps 4-6 for the other long side of the panel.
Step #8:
Working on the bottom of the panel turn under and sew as described above. Because you are folding under some of the long sides those will be a bit bulky but should go through your sewing machine...hopefully! At the end of this step all of your sides should look nice and finished with the exception of the top part of the panel.
Step #9:
Working with the top of the panel fold over 1/2 inch as described above and sew using 1/4th inch seam allowance.
Step #10:
Measure 2 inches from your newly finished edge down an pin. This will create the pocket that you will slip the curtain rod into. See picture.

Step #11:
Sew into place. I sewed directly over my seam from the turn under as shown in the picture.
Tie Backs Instructions
Step #1:
Cut 4 pieces of your desired fabric ~30 inches by ~5 inches.
Step #2:
Pin 2 pieces right sides together and sew around all edges using a 1/4 inch seam allowance. You will need to leave about 1-2 inches open in order to turn out your fabric.
Step #3:
Turn your fabric right side out. Press out the seams being sure to fold and press under your open portion.
Step #4:
Top stitch around the entire tie back using a 1/4th inch seam allowance.
There you have it curtains!
No comments:
Post a Comment